나만의 k8s 클러스터 구축하기 - #2 Amazon EKS편
5 min read
지난 포스트에서는 VirtualBox를 이용하여 쿠버네티스 클러스터를 구축하는 방법에 대해서 살펴봤습니다. 이번 포스트에서는 Amazon EKS를 이용하여 나만의 클러스터를 구축하는 방법에 대해 살펴보겠습니다.
- VirtualBox편
- Amazon EKS편
- GCP GKE편
안내 사항
- Amazon EKS는 클러스터 비용으로 시간당 $0.10, 워커 노드 비용으로 EC2 비용이 청구됩니다. 유의하시기 바랍니다. 테스트 목적이라면 구축 후 바로 삭제하시기 바랍니다.
- Amazon EKS 버전: 2020년 9월 현재, EKS 기본 버전은
1.17입니다.
설치 목록
EKS 클러스터를 구축하기 위해 다음과 같은 툴들을 설치합니다.
awscli
awscli는 AWS의 여러 서비스들을 커멘드 인터페이스를 통해 접근할 수 있게 해주는 툴입니다. 파이썬으로 개별되어 pip로 설치합니다. 뒤에서 살펴 볼 aws-iam-authenticator가 사용자의 신원을 확인하는 용도로 사용됩니다. (aws sts get-caller-identity)
eksctl
eksctl은 weaveworks에서 개발한 Amazon EKS CLI 툴입니다. EKS 클러스터를 손쉽게 구축할 수 있게 도와주는 툴입니다. 재밌는 것은 이 툴은 AWS에서 만든 것이 아니라 쿠버네티스 Network Provider 중 하나인 weavenet를 만든 회사, Weaveworks에서 개발했다는 점입니다. eksctl 툴 하나로 EKS 노드가 생성될 VPC와 관련한 subnet, Security Group, AutoScaling 설정까지 완벽하게 EKS 클러스터를 구축할 수 있습니다.
aws-iam-authenticator
aws-iam-authenticator은 AWS IAM 정보를 활용하여 쿠버네티스 클러스터 사용자 인증(Authentication)을 할 수 있도록 도와주는 툴입니다. 내부적으로 awscli를 이용하여 쿠버네티스에 현재 사용자의 IAM 정보( User나 Role)를 전달합니다. EKS에는 이 IAM 정보와 매핑되는 쿠버네티스 사용자가 존재하고 해당 사용자로 쿠버네티스에 접근을 할 수 있게 됩니다. 사용자 인증에 대한 자세한 내용은 저의 블로그 k8s 인증 완벽 이해 시리즈를 참고하시기 바랍니다. aws-iam-authenticator도 재밌게도 원래는 heptio라는 회사에서 개발한 툴입니다. 현재는 kubernetes-sigs(special interest group)에서 관리합니다.
EKS는 기본적으로 AWS IAM을 이용하여 k8s RBAC과 연동합니다. 이때 필요한 것이 aws-iam-authenticator라는 녀석입니다.

kubectl
kubectl은 쿠버네티스 마스터와 대화할 수 있는 CLI툴입니다.
설치 방법
유저 생성
EKS 클러스터를 생성할 유저를 만듭니다.
AWS 콘솔의 IAM 서비스에 접속하여 사용자 > 사용자 추가 버튼을 누릅니다.
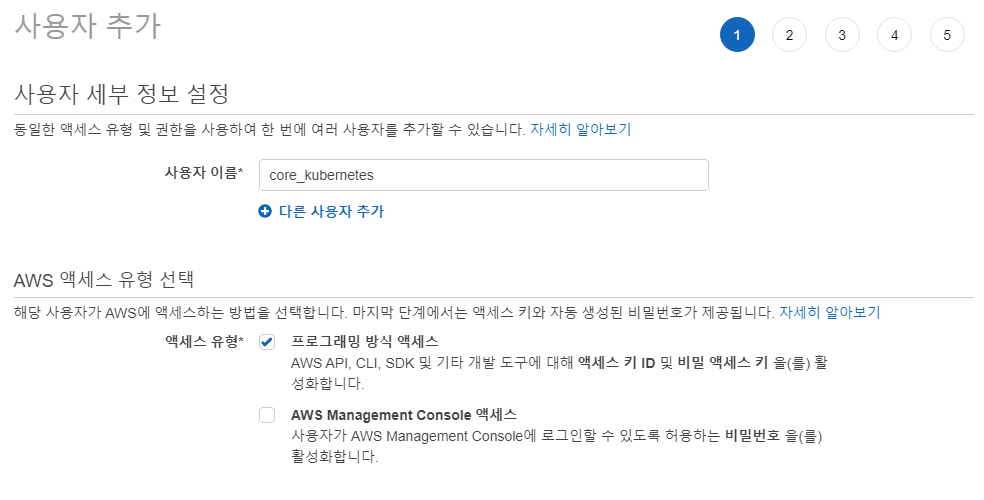
사용자 이름:core_kubernetes액세스 유형: 프로그래밍 방식 액세스다음: 권한버튼 클릭
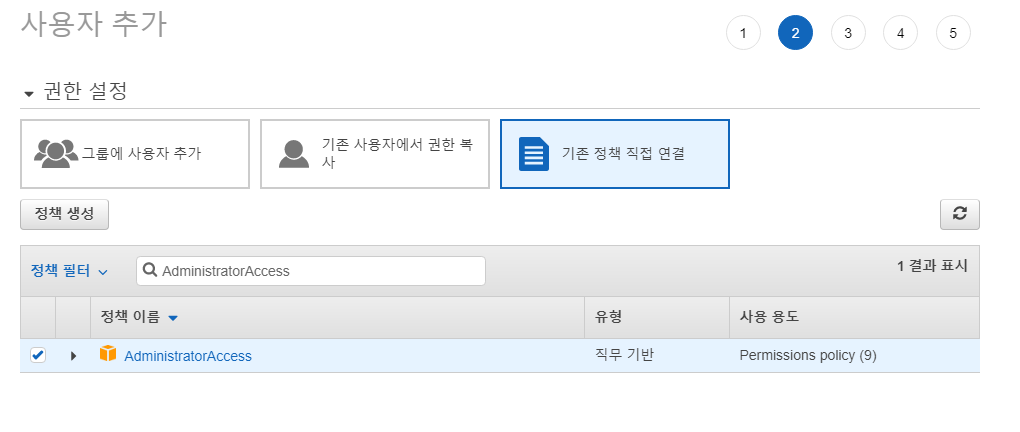
권한설정
- 기존 정책 직접 연결:
AdministratorAccess 다음: 태크버튼 클릭
매우 강력한 권한이니 유의하시기 바랍니다.
다음: 검토버튼 클릭사용자 만들기버튼 클릭
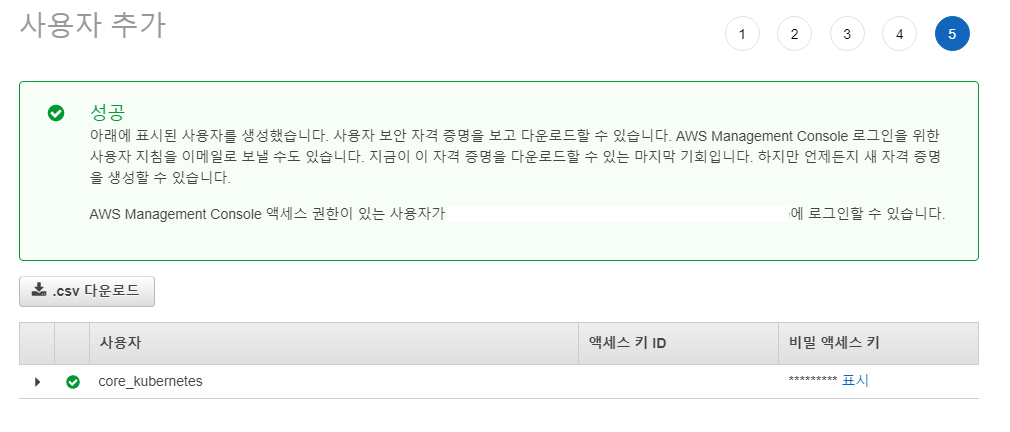
AccessKey,SecretKey를 저장합니다.
EKS 클러스터 구축
EKS 클러스터 생성 명령을 실행할 서버를 접속합니다. (예제에서는 Ubuntu 20.04를 기준으로 작성되었습니다.)
# 기본 패키지 설치
sudo apt update && \
    sudo apt install -y jq apt-transport-https \
    ca-certificates \
    curl \
    gnupg-agent \
    software-properties-common

# awscli 설치
wget https://repo.anaconda.com/miniconda/Miniconda3-latest-Linux-x86_64.sh && \
    /bin/bash Miniconda3-latest-Linux-x86_64.sh -b -p $HOME/miniconda3 && \
    rm Miniconda3-latest-Linux-x86_64.sh && \
    echo 'export PATH=$HOME/miniconda3/bin:$PATH' >> $HOME/.bashrc && \
    $HOME/miniconda3/bin/pip install awscli && \
    source $HOME/.bashrc

# 저장한 AccessKey와 SecretKey를 입력합니다. 리전은 서울(ap-northeast-2)로 지정합니다.
aws configure
# access key: XXXXXXXX
# secret key: XXXXXXXX
# region: ap-northeast-2
# Default output format [None]:

# eksctl 설치
curl --location "https://github.com/weaveworks/eksctl/releases/download/latest_release/eksctl_$(uname -s)_amd64.tar.gz" | \
    tar xz -C /tmp && \
    sudo mv /tmp/eksctl /usr/local/bin

# aws-iam-authenticator 설치
curl -o aws-iam-authenticator https://amazon-eks.s3.us-west-2.amazonaws.com/1.17.9/2020-08-04/bin/linux/amd64/aws-iam-authenticator && \
    chmod +x ./aws-iam-authenticator && \
    sudo mv aws-iam-authenticator /usr/local/bin

# kubectl 설치
curl -s https://packages.cloud.google.com/apt/doc/apt-key.gpg | sudo apt-key add - && \
    echo "deb https://apt.kubernetes.io/ kubernetes-xenial main" | sudo tee -a /etc/apt/sources.list.d/kubernetes.list && \
    sudo apt update && \
    sudo apt install -y kubectl=1.17.9-00

# EKS 클러스터 생성, 다소 시간이 걸립니다. (약 10~20분)
eksctl create cluster --name core-kubernetes --nodes-min 1 --nodes-max 3 --nodes 1 --node-type m5.xlarge --asg-access --node-volume-size 100
# [ℹ]  eksctl version 0.27.0-rc.0
# [ℹ]  using region ap-northeast-2
# [ℹ]  setting availability zones to [ap-northeast-2b ap-northeast-2a ap-northeast-2c]
# [ℹ]  subnets for ap-northeast-2b - public:192.168.0.0/19 private:192.168.96.0/19
# [ℹ]  subnets for ap-northeast-2a - public:192.168.32.0/19 private:192.168.128.0/19
# [ℹ]  subnets for ap-northeast-2c - public:192.168.64.0/19 private:192.168.160.0/19
# [ℹ]  nodegroup "ng-3e8a3cc3" will use "ami-051a4e2ffdcf3ec03" [AmazonLinux2/1.17]
# [ℹ]  using Kubernetes version 1.17
# [ℹ]  creating EKS cluster "core-kubernetes" in "ap-northeast-2" region with un-managed nodes
# [ℹ]  will create 2 separate CloudFormation stacks for cluster itself and the initial nodegroup
# [ℹ]  if you encounter any issues, check CloudFormation console or try 'eksctl utils describe-stacks --region=ap-northeast-2 --cluster=core-kubernetes'
# [ℹ]  CloudWatch logging will not be enabled for cluster "core-kubernetes" in "ap-northeast-2"
# [ℹ]  you can enable it with 'eksctl utils update-cluster-logging --region=ap-northeast-2 --cluster=core-kubernetes'
# [ℹ]  Kubernetes API endpoint access will use default of {publicAccess=true, privateAccess=false} for cluster "core-kubernetes" in "ap-northeast-2"
# [ℹ]  2 sequential tasks: { create cluster control plane "core-kubernetes", 2 sequential sub-tasks: { no tasks, create nodegroup "ng-3e8a3cc3" } }
# [ℹ]  building cluster stack "eksctl-core-kubernetes-cluster"
# [ℹ]  deploying stack "eksctl-core-kubernetes-cluster"
# [ℹ]  building nodegroup stack "eksctl-core-kubernetes-nodegroup-ng-3e8a3cc3"
# [ℹ]  deploying stack "eksctl-core-kubernetes-nodegroup-ng-3e8a3cc3"
# [ℹ]  waiting for the control plane availability...
# [✔]  saved kubeconfig as "/home/ubuntu/.kube/config"
# [ℹ]  no tasks
# [✔]  all EKS cluster resources for "core-kubernetes" have been created
# [ℹ]  adding identity "arn:aws:iam::242008714498:role/eksctl-core-kubernetes-nodegroup-NodeInstanceRole-OV2MXUJF61O9" to auth ConfigMap
# [ℹ]  nodegroup "ng-3e8a3cc3" has 0 node(s)
# [ℹ]  waiting for at least 1 node(s) to become ready in "ng-3e8a3cc3"
# [ℹ]  nodegroup "ng-3e8a3cc3" has 1 node(s)
# [ℹ]  node "ip-192-168-23-187.ap-northeast-2.compute.internal" is ready
# [ℹ]  kubectl command should work with "/home/ubuntu/.kube/config", try 'kubectl get nodes'
# [✔]  EKS cluster "core-kubernetes" in "ap-northeast-2" region is ready

# 클러스터 확인
kubectl get node
# NAME                                                STATUS   ROLES    AGE     VERSION
# ip-192-168-23-187.ap-northeast-2.compute.internal   Ready    <none>   3m18s   v1.17.9-eks-4c6976
Cluster AutoScaler 설정
다음 명령을 이용하여 cluster autoscaler를 설치하기 바랍니다.
# helm 설치
curl https://raw.githubusercontent.com/helm/helm/master/scripts/get-helm-3 | bash -s -- --version v3.2.2

# stable repo 추가
helm repo add stable https://kubernetes-charts.storage.googleapis.com
helm repo update

# metrics-server 설치
helm install metrics-server stable/metrics-server \
    --version 2.11.1 \
    --namespace kube-system

# cluster autoscaler 설치
helm install autoscaler stable/cluster-autoscaler \
  --namespace kube-system \
  --set autoDiscovery.clusterName=$NAME,awsRegion=$REGION,sslCertPath=/etc/kubernetes/pki/ca.crt \
  --version 7.3.4
EKS 클러스터 삭제
다음 명령을 이용하여 EKS 클러스터를 삭제하시기 바랍니다.
# eks 클러스터 삭제, 삭제하는 것도 시간이 조금 걸립니다.
eksctl delete cluster core-kubernetes
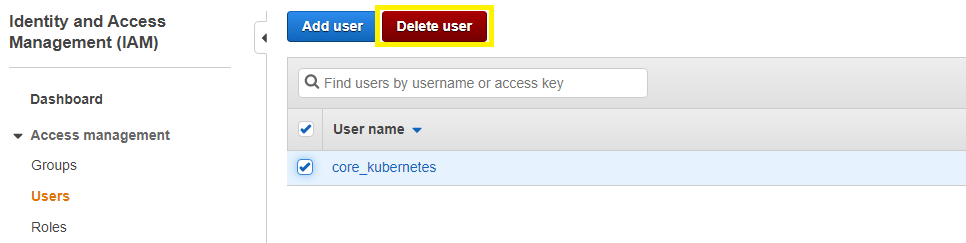
유저 삭제
AWS 콘솔을 접속하여 유저를 꼭 삭제합니다.
마치며
EKS 클러스터를 구축하기 위해서 많은 노력들을 해야 하지만 eksctl이라는 훌륭한 CLI 툴을 이용한다면 손쉽게 나만의 EKS 클러스터를 뚝딱 만들 수 있습니다. 여러분도 EKS를 이용하여 나만의 k8s 클러스터를 구축해 보시기 바랍니다.